Tuesday, December 27, 2016

How to make Nukazuke (Rice Bran Pickeles)


So I always fancied to have my own nukazuke.  As a Japanese, it is essential to have your pickles. 
I wasn't appreciating it until I grew up a little.  I mean I always loved grandma's home made pickles that she always did in the shack in front of our house with nails and eggplants.  And my mom's
seasonal home grown veggies "asazuke pickles." 

And of course, my dad's nukazuke that he seems he can't never ever get it right. 
Yes, Nukazuke takes a lots more (?) efforts I guess. 
It is like growing your own child, you have to take care of them and pamper them constantly. 
Yet, the result of this method is very rewarding. 
You will get perfectly healthy fermented and pickled veggies everyday if you succeed.

And since the day I found the Nukazuke kit from Nijiya, a Japanese market I always go to, I couldn't resist to try :)
What a fun project!!
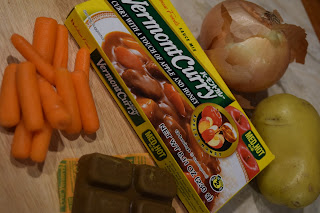
So I bought this...

And it comes with,
1. Organic rice bran (containing soy sauce powder)
2. Salt
3. Kombu (dried kelp)
4. Red Chili pepper
and very much hands on and detailed instruction, yay!


I simply followed the instruction in order to make a rice bran bed for pickles, which is called "Nukadoko."

1.  Prepare a salt water with the salt from the kit. 
Then mix the salt water with the rice bran.

Before I can start actual pickling, I have to prepare
"the bed" in a way that is moist and ready for fermentation. 
In order to do that, I had to add vegetable trimmings to the mixture.  These vegetables replenish the nukadoko with nutrients and provide adequate moisture necessary for the fermentation process. 
So I added daikon greens and cabbage for that, and finally added kelp and seeded red pepper that came with the kit. 

So here comes the hard part!  For the first week after the nukadoko is made, I have to stir it thoroughly from the bottom to the top twice daily, in the morning and the evening!

It says "after about a week of the initial preparation, start pickling vegetables in the nukadoko.  Try to pickle everyday if possible, even by a small amount.  The nukadoko will be futhre fermented, gradually improving the flavor and taste of your pickled vegetables."


It's been more than 10 days now.  I have had a couple of nukazuke cucumbers and carrots!
They weren't that fragrant yet, and a little bit salty. 
Just now, I embedded a daikon radish and a celery. 

I know I can adjust it to my liking someday.

Cuz I DO see that this "bed" and I have a great and hopeful future together!

How to make stollen inspired pound cake


For last couple years, I started appreciate Christmas related baked goods. 
Stollen is one of them. 
I love its buttery aroma and combination of nuts and dry fruits. 
I never could have enough.
But it was such a last minute that I decided to make stollen this year.
So I made Stollen inspired pound cake instead for the Christmas dinner dessert!
It is so much easier and dessert-ier than conventional Stollen.
 
Well...
I soaked raisins and dried cranberries in a 1 big spoon of dark rum for more than 15min.
(You can have fun with this combination! chopped dried apricot, fig, cherry!
whatever suits your tongue)
And Preheat the oven 350F.


1. Melt 80grams of unsalted butter in a microwave, and set it aside until it cools.


2. In a medium bowl, mix two eggs and 70grams of sugar, and 60cc of milk. 
Add melted butter, mix well.  Zest 1/3 lemon and add.


3. Shift 200grams of flour and little a spoon of baking powder, then add it to egg mixture gently. 


4.  Add dry fruits along with rum that they are soaked in.


                  5.  Lightly fold with rubber spatula.
                       Add chopped nuts as well.


Toasted nuts are must.!
I used walnuts and pecan today, but you can choose whatever you want to put in it.
Make sure to crisp them up beforehand.
They are easily burnt so keep an eye on it!


                                    6.  Line the mold with parchment paper. 


7.  Pour the batter in the mold and smooth out the top with rubber spatula.
Bake for 35min until a toothpick inserted into the center comes out clean.   
Then, melt a big spoon of unsalted butter, and brush it onto the cake while it is still hot.


The result is rewarding!


8.  Shake lots of powdered sugar for the look!
So Christmas!

It did not last long in my house :)
But it can be a great gift and little dessert for potluck especially in this season.


Saturday, December 24, 2016

How to make nappa cabbage and pork belly mille-feuille


You know when it is cold outside, Nabe cooking is the best way to warm you up.
It is the wisdom of ancient Japanese cooking.
Eating from one hot pot will make a family tighter and warmer. 
And there are so many different kinds to choose from.
We can eat hot pots everyday of winter!!

Today, I want to introduce the easiest hot pot and best way to intake so much fiber!


We don't need too many ingredients to make this...
In fact, we only need two major ingredients :)

First, nappa cabbage, also known as Chinese cabbage, and thinly sliced pork belly.
Yes, that is it!
So let's get started.


1.  Peel out the cabbage leaves one by one.
Then stack two leaves and two pieces of pork belly as shown below!

Repeat this process one more time
And then, cut it into 1/3.


2.  In a nice sized hot pot, pack the cabbage/pork belly stuffing without any extra space!

Yes, nicely packed!


3.  Pour 2 cups of water and sprinkle a big spoon of concentrated dashi,
add a little spoon of salt, and a big spoon of soy sauce directly on the cabbage/pork pile. 


4.  Put the hot pot on the mid-high heat. 
(So much nappa! can't even put the lid all the way, but don't worry,
as it gets cooked, the lid will go down)


Hot and steamy!.  And healthy as well.  It is great to eat with ponzu sauce or just as it is!


Tuesday, December 20, 2016

How to make Saba no Misoni


“Saba” means mackerel. Saba no Misoni is mackerel simmered in Miso.  It is one of the most popular dishes cooked with Miso.  If you don’t like raw fish, and love sweet miso flavor, you need to try this!


Mackerel is believed to have a very fishy smell among all the fishes so I see a lot of recipes that require using strong flavors such as ginger and green onion in order to erase the smell. 

So we need to prepare some thinly sliced ginger, and somewhat finely chopped green onions.


1.  Cut a cross mark on the skin side of the mackerel.  (To absorb more flavor.)
I used 2 fillets from Norway today. 


2.  In a frying pan, pour 3/4cup of water, 2 big spoons of sake,  and a piece of dried kelp. 


3.  After the boiling and the outer part of the fish has cooked, add the ginger that we prepared earlier. 
And then, turn the heat down. 

4.  Add 2 big spoons of sugar, then cover and simmer with Otoshi buta for 7min. 


Otoshi buta---yes, what is this white paper that is covering the pan...right?
Yes, we needed it. 
But first, what is otoshi buta?--literally means "drop-lid," which is a Japanese-style drop-lid for use in Japanese cooking. These round lids float on top of the liquid in a pot while simmering foods. They ensure that the heat is evenly distributed and reduce the tendency of liquid to boil with large bubbles. This reduces the mechanical stress on the food and keeps fragile ingredients in their original shape. 
So Wiki tells us :)
And most commonly they use wooden otoshi buta back in the day, however, I personally make and use parchment paper because it perfectly works and is clean. 
Cut out parchment paper into the size of the pan, then cut a tiny, tiny hole in the middle for a little ventilation. Voila beautiful otoshi buta!!


5.  In a small dish, dissolve 2 big spoons of miso with a bit of liquid from the pan to make a slurry.
Then add the miso slurry to the pan, and cook another 7 min with Otoshi buta. 

6.  After the liquid get thick and low, take the otoshi buta away and shake the pan carefully to coat the miso sauce to the fish. 

7.  Add green onions and bring it to a boil.


With a bowl of rice!  This is very much like a Japanese breakfast.

Monday, December 5, 2016

How to make Dutch Baby

Recently, there was a rage about "Dutch Baby" in Japan.  Everybody was making it!
It is very easy and so cute.  I know it is not so Japanese...but I wanted to share this recipe.
My daughter loves it for breakfast.  It is very light (sorta) and great to start the day with.

It is definitely versatile because my recipe does not call for sugar at all.
(you can enjoy it sweet or savory with your favorite toppings!)

And there is something to do with this little tiny iron skillet that Nitori (Japanese version of IKEA) started to sell.  It is perfect for a single serving and so cheap! (I think it was around $4.50.) 
I should have bought a couple more...


Anyway, today, I wanted to do something with apples since it is still fall..., right?
I made this easy apple compote in the microwave :)

But first, we are going to fire up the oven to 410F, while it is preheating,
we are going to put the skillet with a dab of butter into the oven.
(So when you pour the mixture, the skillet is already nice and toasty! 
This will make the Dutch baby pop up.)


1.  Mix together an egg, 50cc milk, salt and splash of vanilla extract. 

2. Add sifted all-purpose 30g flour, and whisk well.

3. Take the hot skillet out of the oven and pour the batter mixture in right way.
Bake for 12-15min. 


***Apple compote***

First, cut the apples into quarters and slice them thinly.
Lay them in to a microwavable dish
and sprinkle some lemon juice and granulated sugar to your taste
(cinnamon optional).  Cover it lightly with plastic wrap
and microwave it for 2 1/2 min or so. 
(Depends on the number of apples that you are cooking. I used two little guys this time.)   
Let it cool for 5 min. 


The edges are puffy and crispy!  This is promising :)


So I laid some apple compote and raspberries for color!
You can drizzle some maple syrup or shake on some powdered sugar!


Sunday, December 4, 2016

How to make Japanese curry


So curry...
Unlike Thai or Indian curry,
Japanese curry has its own unique flavor and texture. 
It is more stew-like consistency rather than soupy. 
It goes well with RICE!  Always curry and rice, they go hands and hands. 
So we need to prepare a rice of your own choice before we make curry.
I mean it you really need good amount of rice!

And today, I decided to use "Vermont Curry~ Med Hot"
There are quite a few brands to choose from, and they are
slightly different, and almost always comes in 3 different spiciness.
So experiment and choose the ones that suit you the most!

And for the ingredients, I stick to the basics and add some new stuff here and there. 
Carrots, Onions, Potatoes are must! Cut them into good chunks of bite sizes.
(Turkey, Broccoli, Edamame) can be arranged!


1. First of all, in a med sized sauce pan, put some olive oil and stir
some carrots, onions, potatoes and turkey (I used a turkey ham today).
Cook until onions are somewhat translucent.


2. Pour three cups of water.  Let them boil first, then shimmer until all the vegetables are fully cooked.  Take any scums that comes out the surface while it's shimmering. 


3. Turn the heat off.  Then throw the curry roux cubes ( I used half of the a pack). 
Melt them completely.


4. Turn the heat on again to med-high.  Bring it to boil, then turn the heat to low. 
Cover the pot and let it cook for a while until you achieve the consistency of stew.


5. Then add some green stuff!  broccoli and edamame is my favorite! (Green peas are always nice and remind me of my childhood school lunch.)

***I don't want to lose its beautiful color and crunch so I always put my greens in the end.

6. Stir and shimmer until you cook the broccoli and edamame. 


Green tea and Japanese confection


Yes, Wiki always educates me...

Wagashi (和菓子 wa-gashi?) are traditional Japanese confections that are often served with tea, especially the types made of mochi, anko (azuki bean paste), and fruits. Wagashi are typically made from plant ingredients.  In Japan the word for sweets, kashi (菓子), originally referred to fruits and nuts.  China learned from India how to produce sugar and began trading it to Japan.  The trade increased and sugar became a common seasoning by the end of the Muromachi period.  Influenced by the introduction of tea and China's confectionery and dim sum, the creation of wagashi took off during the Edo period in Japan.  (from Wikipedia)


I never liked wagashi while I was in Japan.  But last time I went to Tokyo, it was a hot hot summer day, and I visited Rokugien, enormous and historical garden, they had this cute little refreshment stand that offers cold tea and wagashi set.  I had to try it.  Amazingly enough, I was stunned by the silkiness and subtle sweetness of wagashi.  And of course bitter and strong green tea is such a blissful paring to it.  Now I don't hate wagashi, I love them... 

Friday, December 2, 2016

How to make Buri no Teriyaki


Buri is a yellowtail, and as you know "Teriyaki" is a Japanese favorite, sweet and savory sauce.

Since buri is so rich with its fat and soft delicate texture,
we don't want to overdo it.

Our goal here is to soak it in a teriyaki sauce for a bit and broil it
just until it is thoroughly cooked. 


1. Make a teriyaki sauce for them to sit in.
Mix one big spoon of soy sauce, 1/2 big spoon of mirin and 1/2 big spoon of cooking sake.
Let the fillet of buri sit in this yummy sweet pool for a 20 min. 


Remember!  half the way through, flip them over.


While it is marinating, we are going to prepare this special aluminum foil :)
As I said earlier, buri has so much oil, for that while it's cooking, excess oil will come out, and we do not want them to swim in their own fat...

In order to catch this excess oil, this special foil comes in handy.
First, cut the foil to a size of baking sheet, and then
crumple the foil into a ball and flatten it apart again carefully
(try not to rip the foil!)

2.  Pat buri with paper towel and gently wipe the dripping sauce.


3. Place them on the foil-baking sheet that we prepared, and put it in the broil
( I used a "low setting" to avoid it to be burnt). 


After 8-9min or so, take them out the broil and brush the teriyaki marinade sauce. 
Then put them back in the broil and dry the surface of the fish.
 Repeat this process twice or so until the buri shines and caramel golden on top!


Enjoy!  with lots of veggies and bowl of rice, this can be a great breakfast, lunch and dinner!
.