Sunday, November 27, 2016

How to make Vegan Yaki Udon (Stir fried noodle)


It is not chow mein.  Udon is quite thick and fulfilling.  This dish can be a great lunch and easy supper since you can basically choose the ingredients and have fun with it.  In that sense, it’s a lot like Okonomi yaki (cabbage pancake).  We can do so many different versions of this.  There are no rules or restrictions, once you master this basic, you can tweak and work with udon as you like!


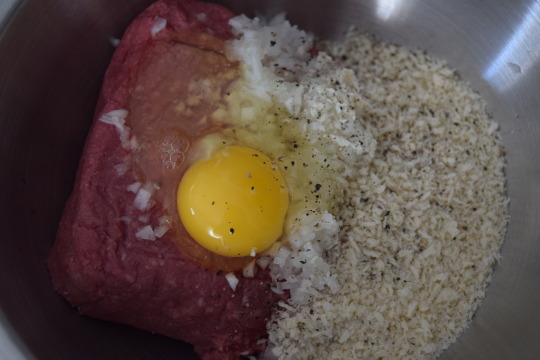
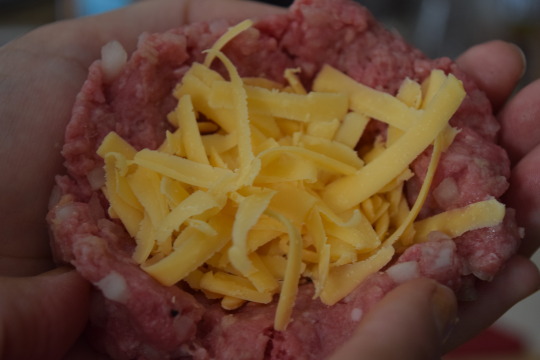
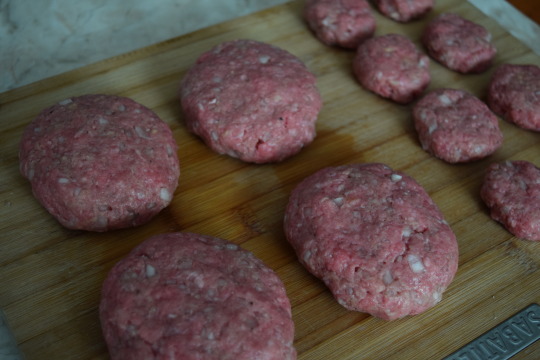
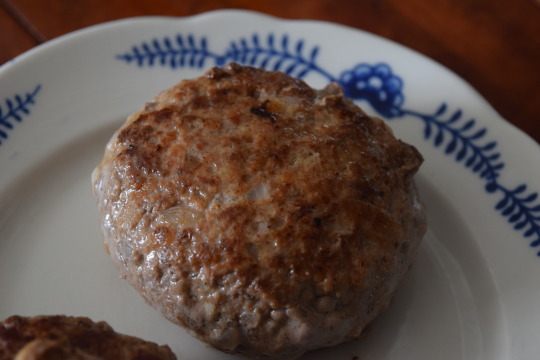
Since we had a big meat ball as a lunch today (Hamburg), I decided to make yaki udon, vegan. 
Let’s see…
1. Chop the veggies.  (As you see below, I chopped ½ of carrot, ½ med onions, 1/6 cabbage, and some green onions). 


2.  Since we can find this Udon noodle in any major supermarket now, I bought the one without any soup packets.  I used two packs of noodles, called “Jumbo Udon” today.  Yes, we can make the udon from scratch, but we should save it for another blog post :p


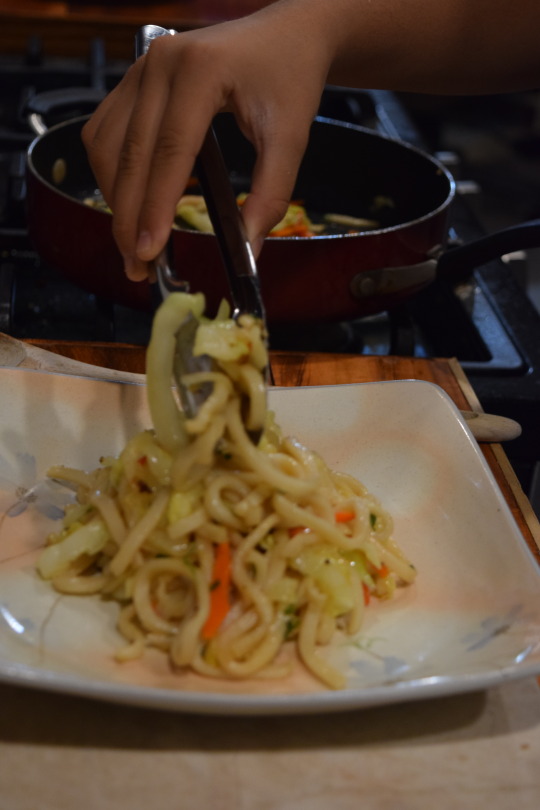
3. In a big pan (preferably a wok of some sort), allow oil to spread and heat up.  Stir carrots and onions first until they are translucent.  Then add cabbage.


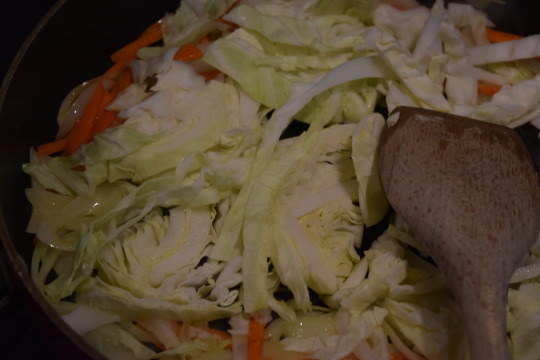
4.  When the cabbage gets wilted, throw in the udon, seperate them without breaking the actual noodles. 


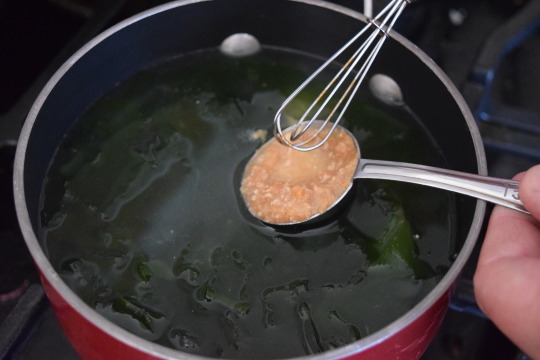
5. Once it is separated and stirred, add 2.5 grams of easy powder dashi (konbu), 2 little spoons of cooking sake ,1 little spoon of soy sauce and 1 ½ little spoons of mirin. 


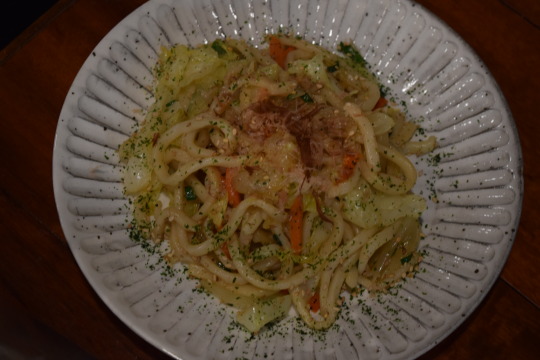
6.  Salt and pepper to your taste.  Add some chopped green onions in the end.


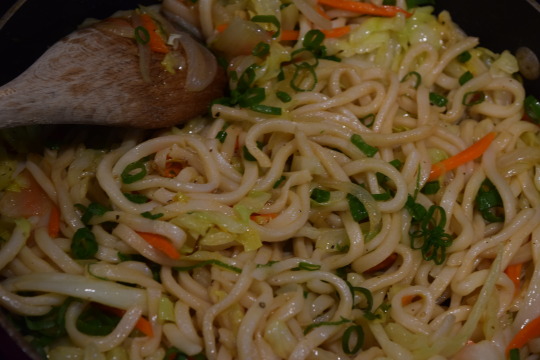
7. Optional but totally recommend are the toppings!  Today, I used roasted white sesame, ao-nori (flakes of dried seaweed) and Katsuo bushi (flakes of dried bonito) to enhance the flavor. 
You can do so many things with this!  You can add some scrambled eggs, pieces of meat, fish cakes etc…
So home-like.  So Japanese-y :)


Saturday, November 26, 2016

Peachy Dreams of Kaiseki


So this is my favorite restaurant in Japan...
For each season, they serve unique fabulous meals with freshest seasonal veggies and fishes. 


Cooking is an art. 

I do dream of this place even now. 


How to make Atsuage (and more!)

so tofu is one of my favorite foods…
There is something about this shape and color.


It became very popular over the years, and there are so many ways to enjoy this majestic ingredient, but today, I decided to make ATSUAGE (deep fried tofu).


1. I think Med-firm tofu is the best for deep frying.  I love soft and silken, but it is harder to deep fry!  I used one med-firm.


2. We need to get rid of  excess water from the tofu.  Use a paper towel to wrap it like you wrap gifts, and place it onto a plate. 


3. Then place another heavy plate on top of it so it will quicken the process of expelling its water.  (Leave this in a fridge for 2-3 hours).


4. It became somewhat thinner and dense.  So I will slice this guy in half. 


5.  I remind you this is a very fragile ingredient to work with.  So handle it with great care!


6. We don’t need too much oil, but we are deep frying these! So pour an inch or so into a pan!


7. After we heat the oil to 350F, we are going to place the tofu in the pan, again with great care.


8. 8-9min on each side.


9. So this is what the end result looks like.  And there are several ways to enjoy this.  Since I was craving something soupy, I made some dashi soup and grated daikon ;)  This is a little bit different than agedashi tofu, which I will cover some other time!


How to make Japanese style Hamburg with oozing cheese


If you ask Japanese kids what is their favorite food, they would probably say…
                                                    Hamburg! 


What’s not to like about this meaty and scrumptious food!

1. So first, you need a pound of beef.  Add an egg and finely (I mean FINELY) chopped 1/3 of a med sized onion and 1/3 cup of panko bread crumbs.  Add some salt and pepper for seasoning. 
Mix them together with your hand until the ground meat gets sticky. 


2.  I don’t usually do this, but I felt special today!  yay ;)  I folded some cheddar cheese in the center.  Pinch the meat and cover the entire cheese so it does not ooze out until you bite into it. 


3.  Toss the ball back and forth to take out all the air inside of the meat (so that it does not break when it is cooking in a hot pan.) 


4.  I made 4 large cheesy burgs and 8 small burgs for my baby’s bento. 


5.  Oil the skillet very well!  We want the pan to be very hot so we can have a nice color on each side.  Sizzling beautifully!


6.  Turn them after as couple min and cover it.  Turn the heat to very low and wait for 5 min or so. 


7. Take them out from the pan, and let them sit for a while.  We can eat it like this with a nice sauce on top.  But today, we are going to make easy sauce in the pan that we have been cooking the burg. 


8.  I used “Tonkatsu sauce,” “Ketchup” and mustard.  Heat them up with med heat until they are bubbly and combined well. 


9. Put the burgs back into the pan and coat them with the sauce all the way.  Serve immediately to achieve the effect of cheese oozing out from the center(remember? the fun stuff!!) 


How to make Miso soup (basic)

Using the broth that we made previously, we can start to take the most popular soup from Japanese restaurants to another level.  After you learn the basic soup, you can create and customize your own with different ingredients!

It’s hearty and warm, and great when it’s cold outside. 
But first, we need to know more about miso.  Let me see what Wikipedia says…

Miso is a traditional Japanese seasoning produced by fermenting soybeans with salt and koji (the fungus Aspergillus oryzae) and sometimes rice, barley, or other ingredients. The result is a thick paste used for sauces and spreads, pickling vegetables or meats, and mixing with dashi soup stock to serve as miso soup called misoshiru (味噌汁), a Japanese culinary staple. High in protein and rich in vitamins and minerals, miso played an important nutritional role in feudal Japan. Miso is still widely used in Japan, both in traditional and modern cooking, and has been gaining worldwide interest.
Typically, miso is salty, but its flavor and aroma depend on various factors in the ingredients and fermentation process. Different varieties of miso have been described as salty, sweet, earthy, fruity, and savory. (by Wikipedia)


So there are so many different kinds of miso out there.  How do we choose the one that we like?
You have to try and choose whatever suits your tongue.
As growing up in an area that mostly uses Awase miso (mixed), I use that for anything that calls for miso. 
So anyways,
Let’s make basic miso soup.


1. Bring 2 cups of water to a boil.  And this time, I used a Dashi powder so I can be lazy ;)  I used 2.5 gram of “Sozai Chikara Dashi–Konbu.”


2. I could have done this beforehand, but I choose to do it while the water is coming to a boil.  Bring seaweed to life!  Seaweed is filled with so many health benefits I tend to have more whenever I can! 
two heaping little spoons of Wakame (seaweed) would do.  Soak them in room temp water for a while.  It does not take too much time to become…


something like this!


And for another ingredient, I can’t think of anything else but soft silken tofu.


3. Dice it into whatever size you want.  My daddy liked to scoop and drop it so it looked more wholesome and rustic.  But I diced it pretty small this time.
And I squeezed the excess water from the Wakame and threw both the Wakame and tofu in the boiling water. 


4. So Finally miso!  I used Organic Miso from Nagano, Japan. 


5. A big spoon of miso goes a long way!
Turn the heat off.  Then, melt the miso into the pot.  (I would recommend using a little strainer to melt the miso in since you don’t want any lumps in your miso soup.) 


6.  Heat the soup to boil, but do not let it boil for a long time.  We just need to reheat it, otherwise, you’ll lose the subtle miso and other ingredients’ flavor.


Serve and enjoy before it gets cold.  I would have this every morning. 


It is ready!  yum yum!  This is great with a bowl of rice and tamago which will be next on our agenda to cover!


How to make Japanese Broth

With Katsuobushi (Dried bonito flakes)-

With Konbu(Kelp)-

With Shiitake mushroom(Dried)-

With Niboshi(Dried baby anchovies and sardines)-

With combination of two or more above-

With instant powder-please use the ones with no MSG.  This is not that great compare to ones that we have made above. However, it is handy and convenient when you are in a hurry ;)

How to cut veggies


"wagiri"-cut cylindrical or spherical vegetables crosswise into round slices. The size of the slices depends on the recipe but, in any case, the slices should be of even thickness

"hangetsugiri"-This shape is suitable for boiled dishes, soups, and stir-fried dishes. It is often used for daikon (Japanese white radish), carrots, and eggplants.

"ichogiri"-The shape is similar to ginkgo leafs (icho), hence the name. This style is suitable for soups, salads, and dressed dishes. It is often used for Japanese white radish (daikon), potatoes, and carrots.

"rangiri"-Ran-giri is cutting an ingredient into irregular-shaped pieces. The increase in surface area created from this style of cutting allows ingredients to cook evenly in less time and absorb more flavor.

"koguchigiri"-means "end cuts," which is the cutting way to slice long, thin foods crosswise from the end, and often used for long shaped vegetables, such as leeks, okra and cucumbers

"usugiri"-Thin slices are made by cutting either lengthwise or crosswise. To retain a firmer texture, slice lengthwise. For a softer texture, slice crosswise.

"sengiri"-Sen-giri, also known as "julienne" is to slice into thin pieces about 2–3 inches long, make a pile of 5-6 slices, and cut into thin strips. For a firmer texture, make the slices lengthwise. For a softer texture, make crosscut slices. For cabbage, remove the core, make a stack of a few leaves, roll the stack up and cut into strips.
(("hoso-giri"-the same technique as for julienne but usually the sticks are thicker.))

"mijingiri"-is the technique of finely chopping ingredients. The way to chop coarsely is called aramijin-giri. It is the same technique as mijin-giri but more coarse.

"kushigatagiri"-The shape of kushigata-giri is similar to kushi (Japanese hair combs).
Cut spherical vegetables, such as onions, tomatoes, apples, and lemons, into quarters lengthwise. First, cut into half, place cut side down, and cut into 4-8 wedges

"hyoshigiri"- Cut into desired length and width pieces of even thickness.
"tanzakugiri"-Cut into desired length and width pieces as for hyoshigi-giri but thinner than the one with Hyoshigi-giri.

Basics for using my recipes

1. Measurement...Big spoon=15ml and Little spoon=5ml

Japanese spoons are little bit different
than conventional teaspoons and tablespoons


2. Minimal condiment for Japanese cooking...
  • Salt (Sea salt preferred)
  • Sugar
  • Miso paste
  • Soy sauce
  • Mirin(hon mirin)
  • Sake(cooking Japanese wine)
  • Rice Vinegar
We will talk about them as we go more depth.